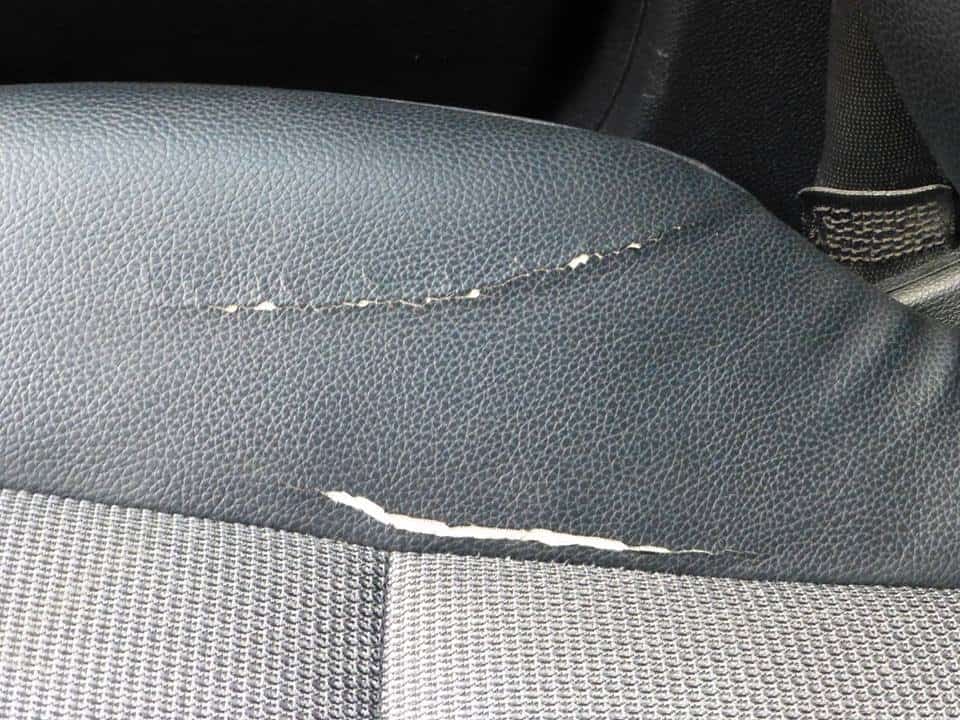
Leather car seats are a luxurious addition to any vehicle, offering both comfort and style. However, over time, they can become susceptible to wear and tear, including unsightly tears or cuts. Instead of replacing the entire seat, you can often repair these tears yourself, saving money and preserving the overall aesthetics of your car’s interior. In this article, we will guide you through the steps to repair a tear in a leather car seat.
Materials You’ll Need:
Before you begin, gather the following materials:
1. Leather repair kit: You can find these kits at automotive or hardware stores. They typically include a variety of colored leather patches, adhesive, and tools for repair.
2. Clean, lint-free cloth
3. Leather cleaner
4. Fine-grit sandpaper
5. Leather conditioner
6. Sharp scissors
7. Tweezers
8. Iron (with a low heat setting)
9. Heat-resistant surface (like a wooden block)
10. Painter’s tape or masking tape
11. A spare piece of leather (optional, for larger tears)
Step-by-Step Guide:
1. Clean the Seat:
Start by thoroughly cleaning the seat. Use a leather cleaner and a clean, lint-free cloth to remove any dirt, grime, or oils from the area surrounding the tear. This step is crucial to ensure proper adhesion of the repair materials.
2. Trim Loose Threads:
If there are any loose threads around the tear, trim them with sharp scissors. This will make the repair process smoother.
3. Sand the Edges:
Gently sand the edges of the tear using fine-grit sandpaper. This will create a smoother surface for the repair materials to adhere to.
4. Choose a Patch:
Select a patch from your leather repair kit that closely matches the color and texture of your car’s leather. If you can’t find an exact match, choose a patch that’s slightly darker rather than lighter, as it’s easier to lighten the patch than to darken it.
5. Cut the Patch:
Cut the patch to a size slightly larger than the tear, allowing for a small overlap around the damaged area.
6. Apply Adhesive:
Use the adhesive provided in the repair kit to coat the back of the patch and the area around the tear. Follow the instructions on the adhesive for the recommended drying time.
7. Position the Patch:
Carefully place the patch over the tear and press it firmly onto the damaged area. Use tweezers or a clean cloth to smooth out any bubbles or wrinkles. If you’re dealing with a larger tear, you may need to insert a spare piece of leather underneath the patch to provide additional support.
8. Heat the Patch:
Cover the patch and surrounding area with a clean cloth and set your iron to its lowest heat setting. Gently press the iron over the cloth for a few seconds. The heat will help the adhesive bond the patch to the seat. Be cautious not to overheat or scorch the leather.
9. Let it Dry:
Allow the adhesive to dry completely as per the manufacturer’s instructions. This usually takes a few hours, but it’s essential to ensure a strong bond.
10. Condition the Seat:
Once the patch is dry, apply a leather conditioner to the repaired area to restore its suppleness and protect it from future damage.
11. Remove Excess Adhesive:
If any adhesive has seeped out around the edges of the patch, carefully scrape it away using a razor blade or a sharp knife.
Conclusion
Repairing a tear in a leather car seat can be a cost-effective way to maintain the appearance and functionality of your vehicle’s interior. By following the steps outlined in this article and using a quality leather repair kit, you can restore your leather car seat to its former glory and enjoy the benefits of a luxurious, comfortable ride once again. Remember to take your time and work carefully, and your leather car seat will look as good as new.